Thursday 22 December 2016

Couple of tiny details added last night - manual points lever frame and point rodding to each of the three manually controlled points for the fuel roads and the maintenance depot:
 And at the warehouse, air-conditioning machines on pallets, wrapped up for delivery:


Monday 19 December 2016

Early Christmas present from my girlfriend - a Class 37 in DRS livery, with sound fitted. I have the Hornby TTS Network Rail from a few years ago, and the comparison between the two models is night and day really - but then the new one does cost three times as much:


 Here I have been experimenting with laying the siding to the goods platform without any ballast, intending for it to just be completely overgrown with grass and weeds. This is the first stage - some 2mm static grass sheet cut to size and stuck down. I'm not sure yet whether this is actually going to work.

Something that has worked is my car park behind the maintenance shed. Just needs some white lines painting and the netting attached for the wire fence, then some grass added between the track and the fence. This area wont get inspected all that closely because its behind a building, so I just need to fill in some basic scenery.

Thursday 15 December 2016

Tuesday 13 December 2016

The latest addition to the fleet - 08417 in Network Rail yellow:


Fitted with DCC and a Stay-Alive by OliviasTrains, with a sneaky discount on their Black Friday sale. It runs silky smooth, as would be expected. It has opening doors, so I may add a driver hanging out of the door in due course, and it also needs weathering.

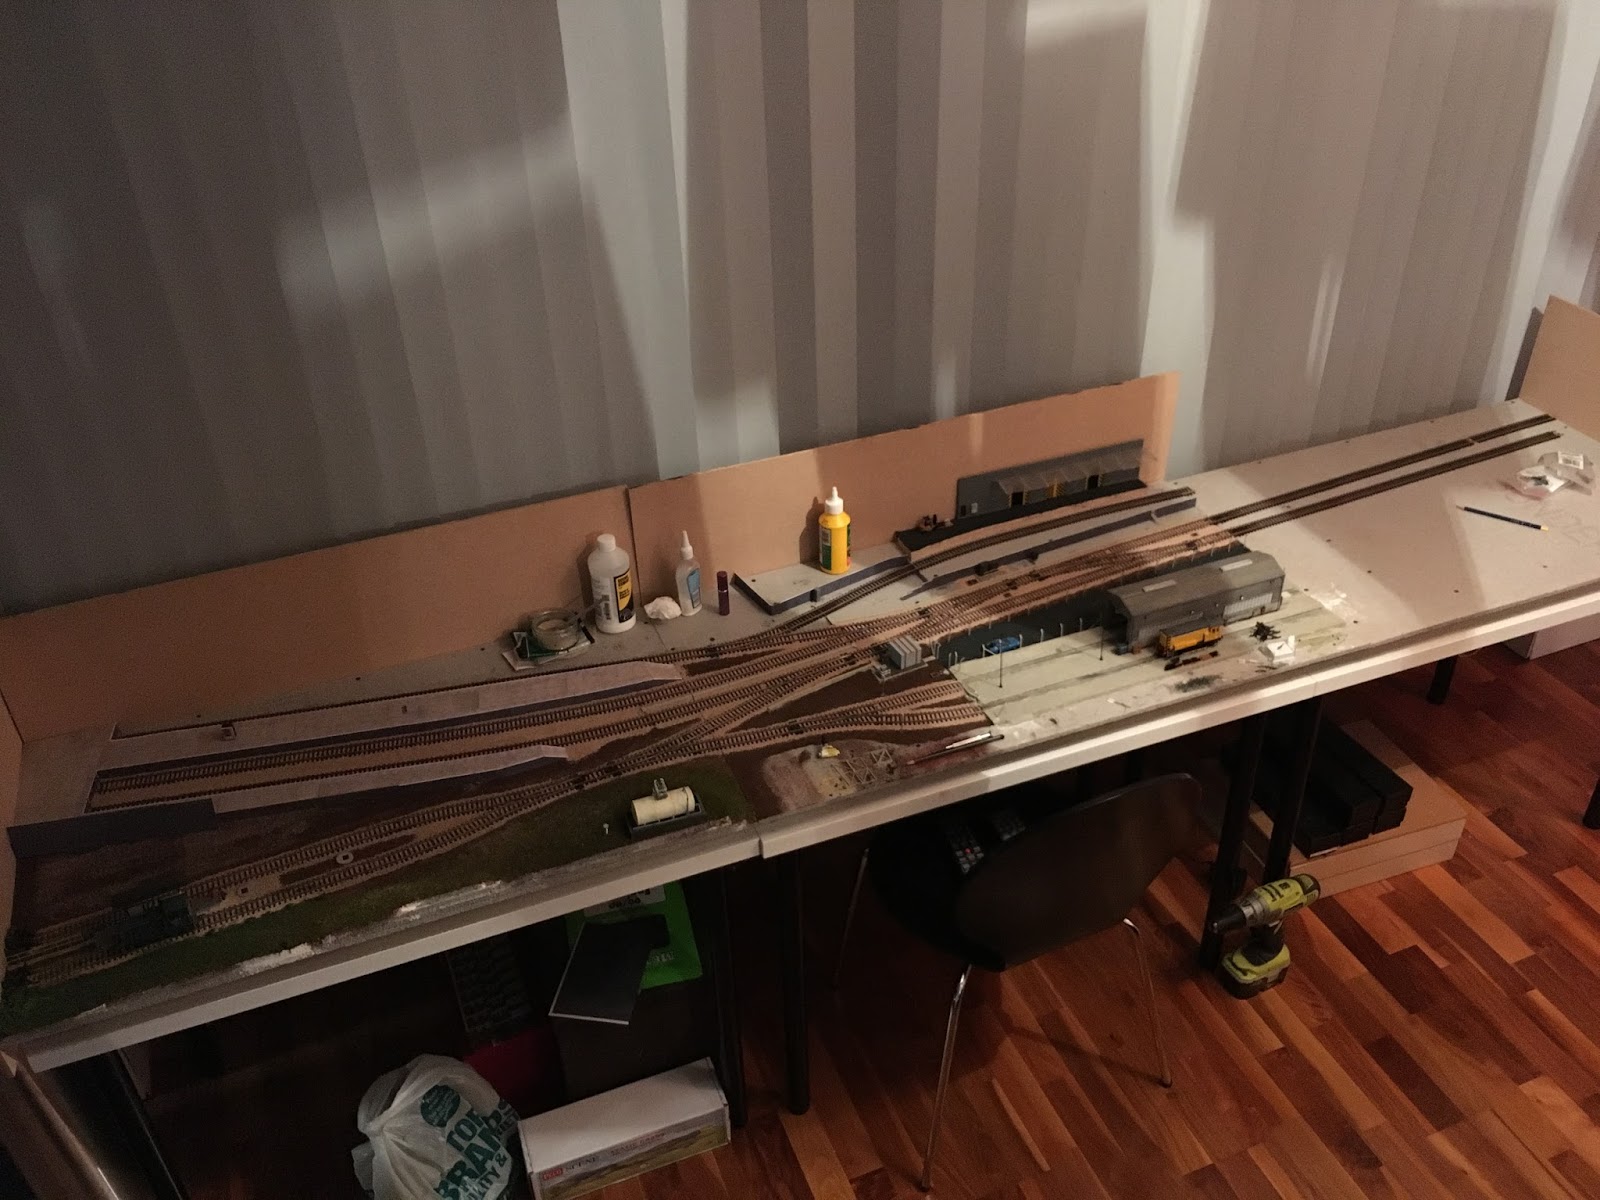
Progress on the layout - I've added some keyclamp handrails:


and finished the station platforms with a paving slab pdf downloaded from scalescenes for £1.99, and official Network Rail platform edge copings. Although I think there should be a tactile paving strip just behind them as well:


I've also nicked my low-relief warehouse that I made last year for my garage layout, which will be totally redesigned once I've finished this one. Its made from leftover bits from a Peco TMD kit, and some cantilever angle-iron trusses that I bought second hand from my local model shop for £2, and some corrugated clear plastic sheet. The canopy is a bit wavy, I will have to take that off and do it again:


Also painted half of the car park and started to put the security fence up:


And I've also finished all of the ballasting to the main two scenic boards. There is a little to do on the third board, but thats mostly non-scenic so I havent started work on that one yet.

Thursday 8 December 2016

Just received a tiny little vending machine from scalemodelscenery.co.uk (pencil for scale):


Wednesday 7 December 2016

Some more work on the grass, bushes and weeds near the fuelling point. Taken while the glue was still wet, and still more work needed, but its definitely getting there now.


Tuesday 6 December 2016

Initial experiments with static grass. Peco applicator and 6mm 'autumn grass' in one uniform coat is all I've done so far:

It looks ok - I actually think it looks a lot better in that photo than it does in real life, but its just the first run so it should improve once I start layering different lengths and colours into it.

I have also added the brickwork patterned card to the platform edges, polyfilla'd the screw heads and ballasted the three station tracks, but none of that is particularly photo-worthy just yet.

Thursday 1 December 2016


More ballasting, and some stop signs leading out from the depot.

Wednesday 30 November 2016

Took a few minutes out from the drudgery of ballasting track to pose a few little scenes:


Ok, dont ask me why they're upside down, the images are the right way up on my computer when I upload them! I dont know how to fix that, there doesnt appear to be a way of rotating them in Blogger.

Monday 28 November 2016

Did some ballasting at the weekend, and also finished the Polyfilla embankment and painted it brown as a soil undercoat to the static grass I'll add to it later:


Friday 18 November 2016

Thursday 17 November 2016

Alternative signalling arrangement crude sketch (for discussions on RMweb)

Tuesday 15 November 2016

Some photos of last night's progress, yard lamps and a bit of a hill near the fuelling roads. I might extend this all the way to the end of the board actually, because it looks a bit alien at the moment, like it doesnt belong there as part of the original landscape:


Monday 14 November 2016

So after success with the Polyfilla, and some considerable time spent sandpapering it down and testing it, I now have a concrete yard for my depot:


I'll paint this concrete colour and add some dirt and oil etc, plus a security fence around the outside and a couple of yard lamps.

Thursday 10 November 2016

I began work on the concrete hardstanding area in front of the depot on Tuesday evening. I bought some Hobbycraft own brand clay as an experiment, this is what it looked like on Tuesday night:
And this is what it looked like on Wednesday morning:
Rubbish :-(

So, the way I've always done it is using Pollyfilla. You do get some cracking, but nothing like the picture above, and it seems to stick to the baseboard as well, unlike the clay which all came up really easily with light finger pressure. I ran out of Pollyfilla last night, here's what it currently looks like after I ripped all the clay up and put the new stuff down:

Hopefully when I get back from work it will still look like that, and I can get a new tub and finish the rest off.

Something else I bought at Hobbycraft was this 'medium buff' ballast, for an experiment, and I think it looks quite nice, certainly better than the rather boring grey stuff I used on the layout in the garage:
It now looks quite pleasingly realistic I think.

Tuesday 8 November 2016

 Track painting is now complete, which is a fairly tedious and delicate process whereby you apply a line of rust coloured paint to the visible side of each rail with a very fine paintbrush. I've saved 50% of the work by not doing the 'back' of the rail (which is the side we will see when operating it, from the back), and you have to be careful not to touch the top of the rail with the paint as this is where the train wheels take power from the track. Just the ballast to add now to finish the track work. Photo below:


Here's a couple of shots of the layout as it currently stands:


And a couple of photos showing the station platform, where I have now tapered the platform ends, and installed the cable trunking for the signals:


and this is the entrance to the goods siding, which is up a bit of a slope to add some visual interest to an otherwise flat layout. I've also installed some cable trunking here to a relay cabinet and what will be a ground signal on the left, and made a start on the retaining walls to the yard behind.


Next job is to put in the concrete hardstanding for the depot, which I did using Polyfilla on my other layout, which seemed to work quite well so I'll probably do that again.

Wednesday 26 October 2016

A quick photo of the underside of the middle board, showing the DCC 'bus' wiring, basically a negative and positive wire running constantly around the board with smaller feeder wires which connect to the track:

 The feeder wires are made by Peco and have rail joiners fitted to the end of them, so you slot standard track pieces into them from either side and there you go, instant easy and almost completely hidden power feeds. The red plastic connectors are 'piggyback' style clips, which simply click into position over the bus wire, then you poke the feeder wire into the other part of the clip and clamp it down with large grips or pliers and it makes the connection for you AND retains the continuity of the bus wires. Excellent little things.

I bought a second power connector for the NCE Powercab control system, so I can simply unplug the mains adapter and the controller(s) from the garage layout and plug into this one.

Wires to operate the points have yet to be fitted in the above photo, nor the connections to the left and right boards, so I'll take a photo of that soon and explain the construction - its all pretty simple.

Tuesday 25 October 2016

So this is the brief: build an exhibition-standard model railway, from scratch, for next year's 'StowRail' show on May the 23rd. Here's what I'm building:

(modelled on AnyRail 5 software)

3 platform terminus station, fuelling point and small maintenance depot/yard, plus a goods loading facility as well. Modern image, using DCC control - meaning I can use all my existing models and NCE controller, set in present day 'ish' (ie I reserve the right to bring back defunct companies because I like their livery) in the Malvern/Hereford/Worcester area (again - 'ish').

More details to come shortly, I've made a start and constructed the baseboards, laid the track and wired it all up, fitted all the hidden manual 'wire in tube' point controls, and tested it all. So from this point we've got just under 7 months to do the fun bit - ie the scenery.